


This Cost and Usage Report overview will go through the required IAM permissions for billing analysis, how to create a cost and usage report (CUR), and how to set up a local analysis environment using SQLite3.
If you have questions, feedback, or other AWS Billing problems you’d like to discuss, you can contact our team.
IAM Permissions
Identity and Access Management (IAM) permissions get complicated very quickly. The advantage of using Sqlite3 and doing local analysis is minimizing permissions and access needed in your AWS Account. The best way to track access to billing is to create an IAM role for engineers with access to billing information. The IAM permissions below practice the ‘least privilege principle’ for anyone in your engineering team that needs to perform billing analysis.
First, this policy allows users to access the billing console and create, modify or delete CURs.
{
  "Version": "2012-10-17",
  "Statement": [
    {
      "Effect": "Allow",
      "Action": [
        "aws-portal:ViewUsage",
        "aws-portal:ViewBilling",
        "cur:DescribeReportDefinitions",
        "cur:PutReportDefinition",
        "cur:DeleteReportDefinition",
        "cur:ModifyReportDefinition"
      ],
      "Resource": "*"
    }
  ]
}
Second, these are the permissions to list S3 buckets and download CUR files for analysis. Depending on the resources in the account, it may make sense to limit the resources this policy provides access to.
{
    "Version": "2012-10-17",
    "Statement": [
      {
        "Effect": "Allow",
        "Action": [
          "s3:GetBucketPolicyStatus",
          "s3:GetBucketTagging",
          "s3:ListBucketVersions",
          "s3:PutBucketOwnershipControls",
          "s3:CreateBucket",
          "s3:ListBucket",
          "s3:GetBucketAcl",
          "s3:GetBucketPolicy",
          "s3:GetObjectAcl",
          "s3:GetObject",
          "s3:GetAccountPublicAccessBlock",
          "s3:ListAllMyBuckets",
          "s3:PutBucketPolicy",
          "s3:GetBucketLocation",
          "s3:GetObjectVersion"
         ],
         "Resource": "*"
        }
    ]
}
Cost and Usage Report Documentation
As part of the Developer’s Guide to AWS Costs, we have added a Cost and Usage Report Documentation blog post to our website. For the over 200 fields in the Cost and Usage Report, this document will describe the field and provide sample values to help developers analyze their specific use cases.
This document is always a work in progress. If there are questions or comments on the information in the documentation, please let us know in our GitHub Discussions!
Creating a Cost and Usage Report
As noted in the introduction, the main data source used for cost analysis is the Cost and Usage Report (CUR). This is the most detailed billing report offered by AWS and is the ‘source of truth’ for what your account is being charged at the end of the month.
The following steps will walk through how to create a new Cost and Usage Report:
- Navigating to the billing console.
- Selecting data and storage options.
- Verifying that the report was created properly.
Step 1: Navigate to the Billing Console
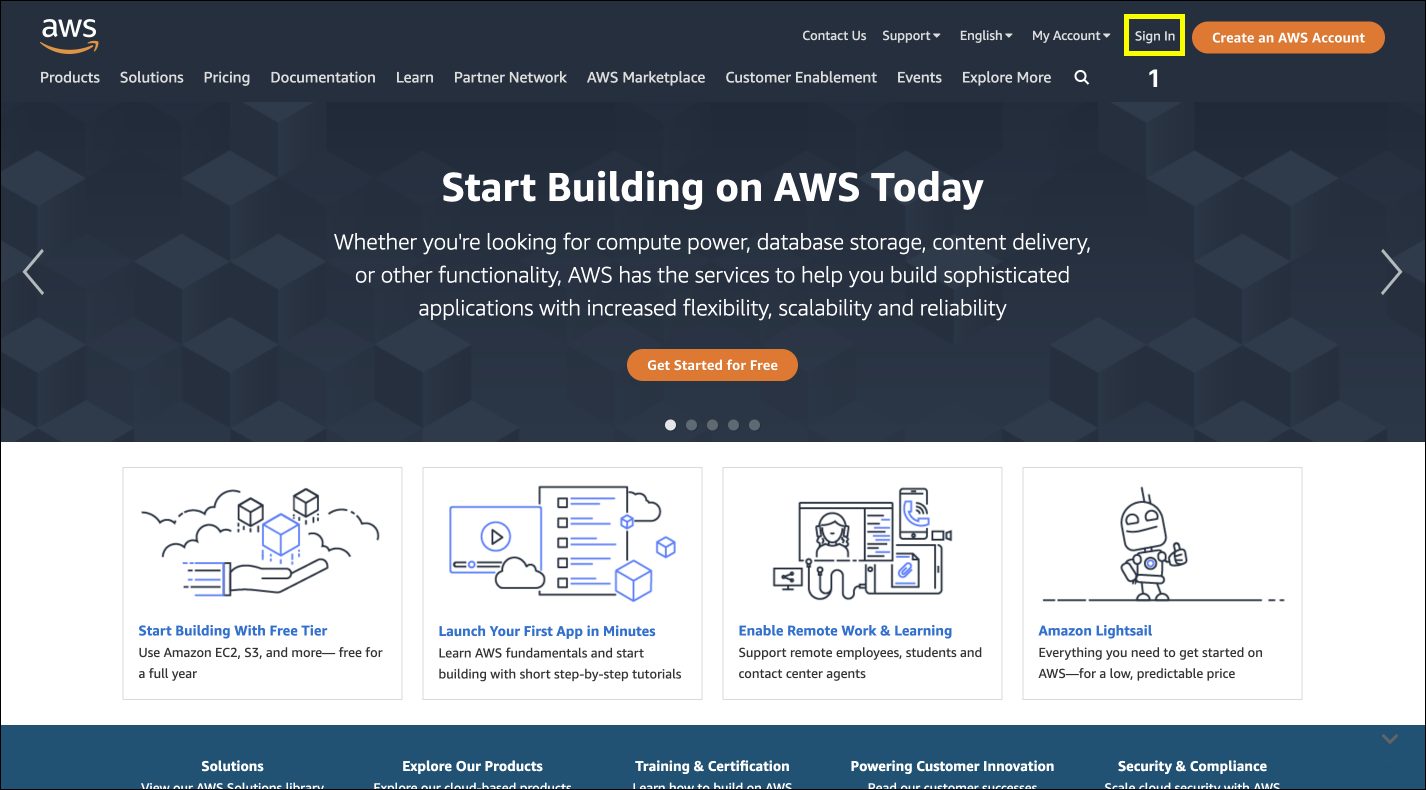
First, go to aws.amazon.com and click Sign In in the top right corner.

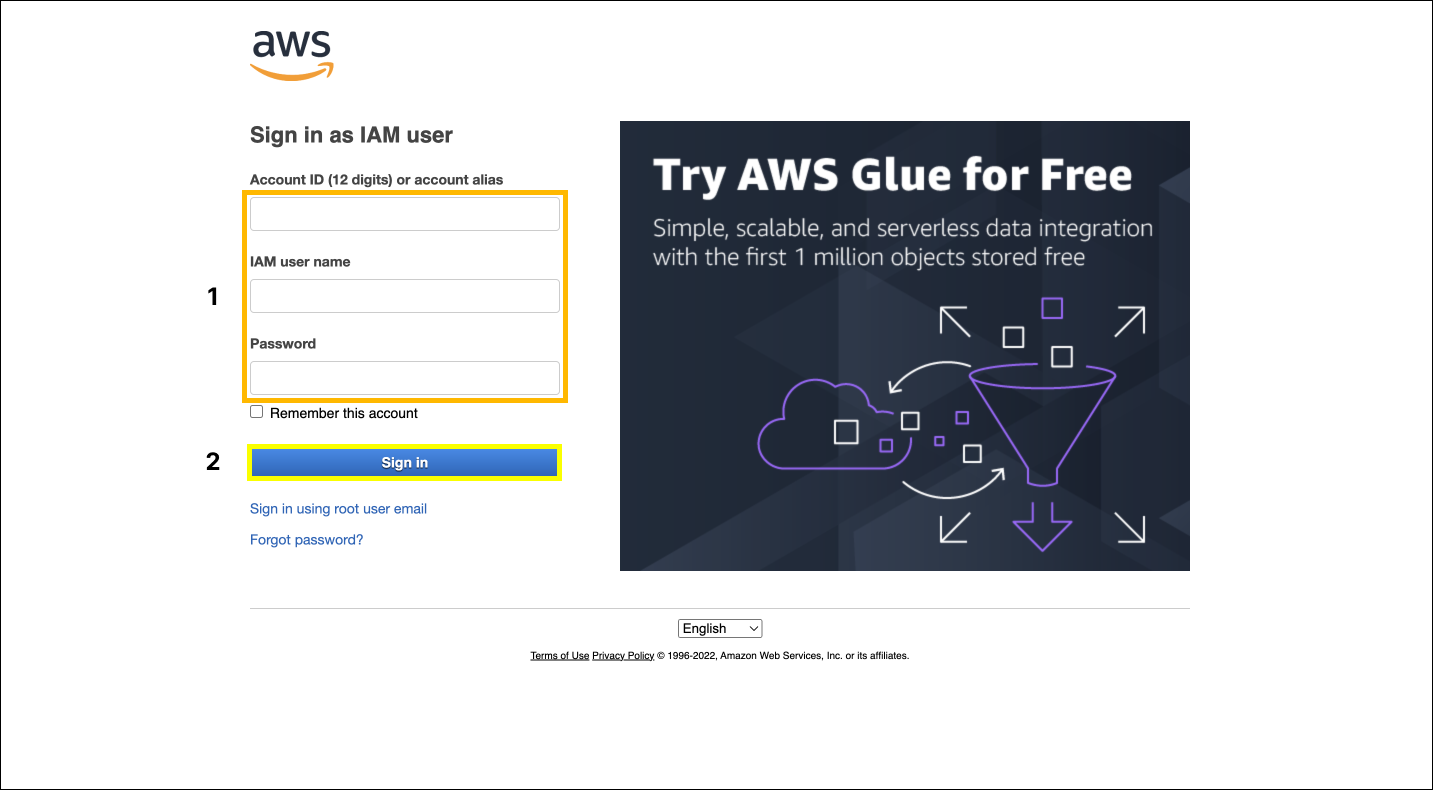
Step 2: Log in to AWS
Enter your Account ID, IAM user name, and password. If you don’t have MFA set up for your account, you should. MFA is the best way to make sure your account doesn’t get hacked. Then click Sign In.
Not which account is being used. First, engineers should understand how AWS Organizations impact your CUR. Management and member accounts of an organization can each have their own CUR enabled. Management accounts with a CUR will show details for the management account and all member accounts in the organization, while a member account with a CUR will only show details for that account.
As an engineer, it is important to understand whether it is necessary to see costs in a specific account or across all your accounts. Second, ensure the account being used is covered in the IAM permissions for the newly created IAM role.
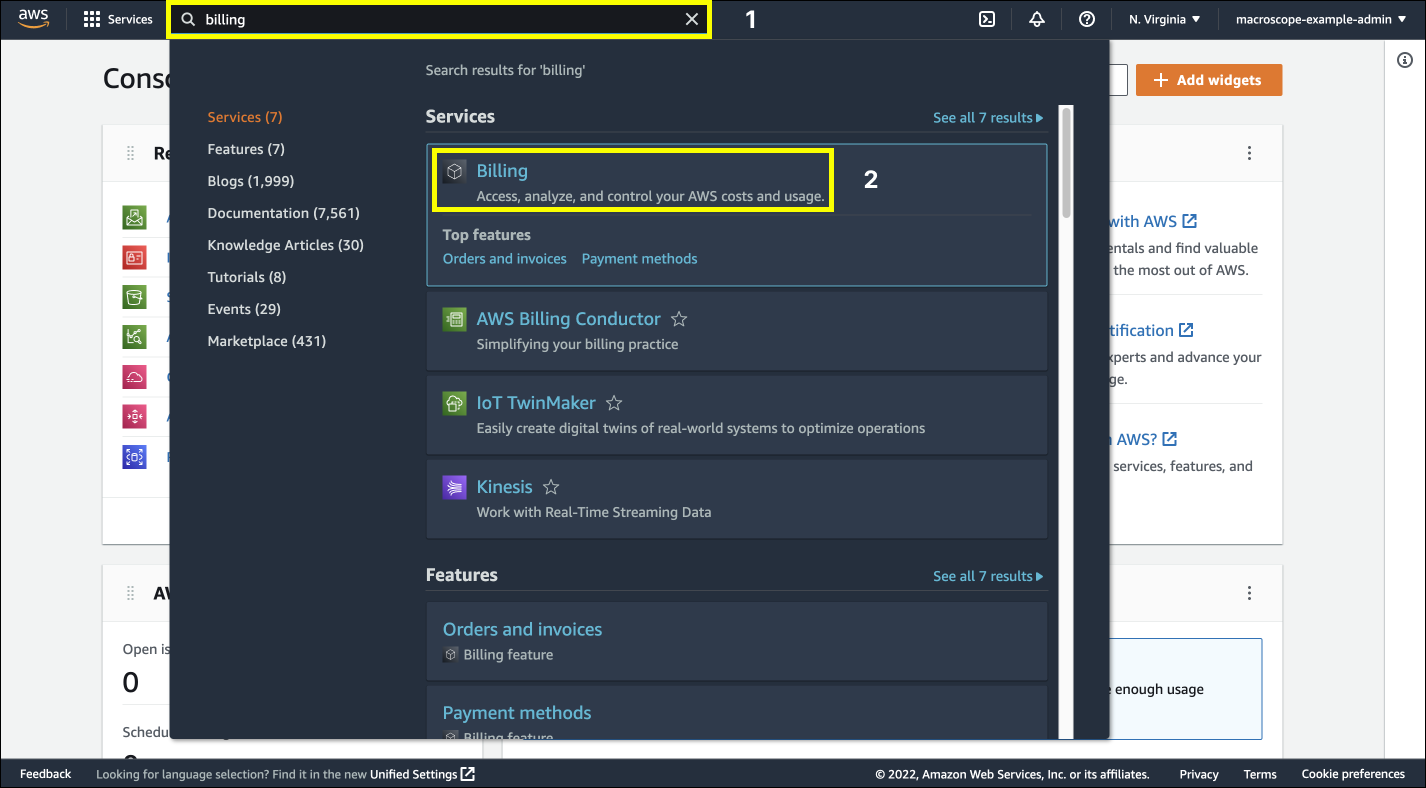
Step 3: Search for Billing
At the top of the AWS Management Console, in the search bar, search for billing and click on Billing under Services in the search results. This will bring you to the AWS Billing Dashboard.
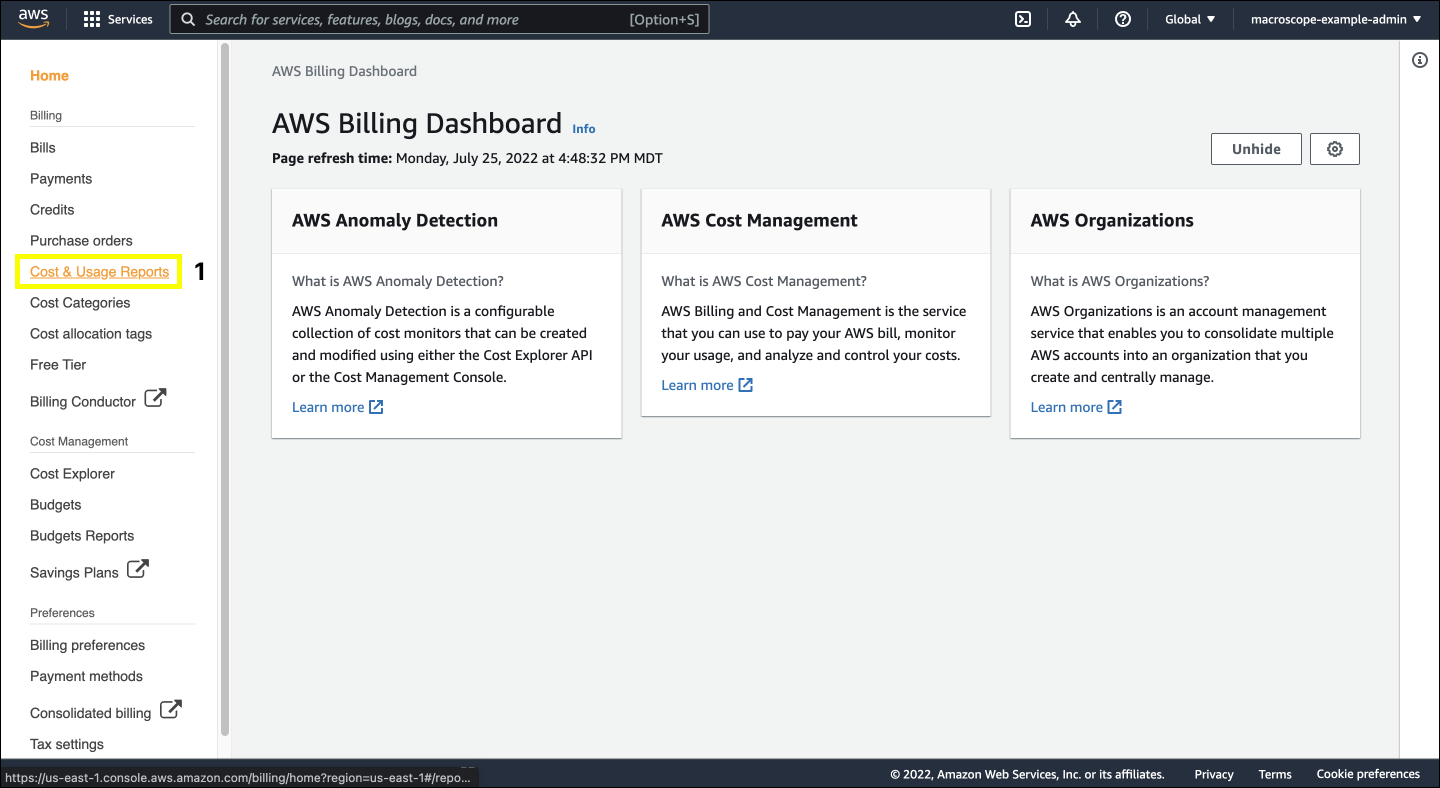
Step 4: Navigate to the ‘Cost & Usage Reports’ Page
Once on the AWS Billing Dashboard, click Cost & Usage Reports in the left banner.
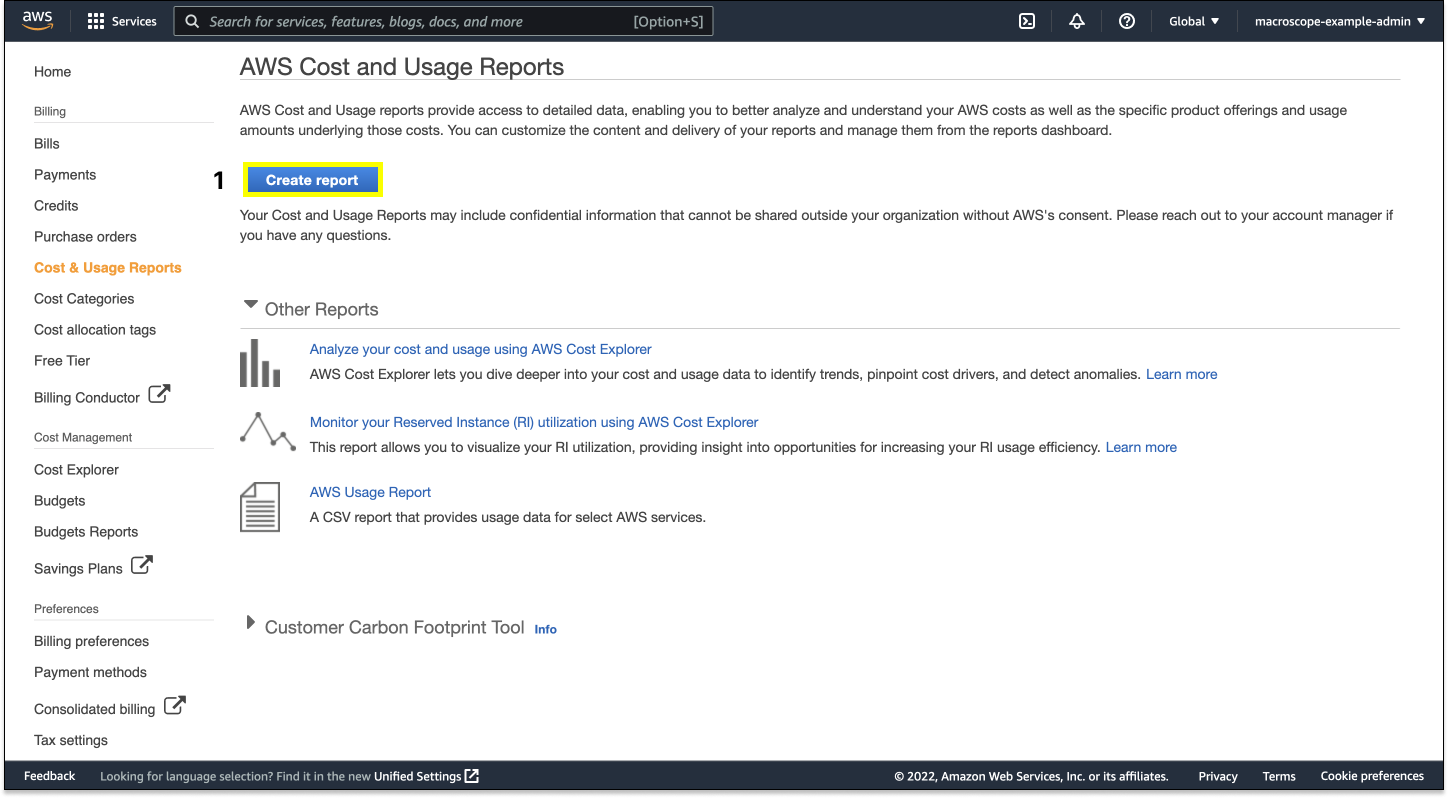
Step 5: Create a new Cost and Usage Report
This page will show you all the active CURs in your account and give users the ability to create a new report. For this demo account there are no active CURs. To create a new CUR, click on the blue Create Report button.
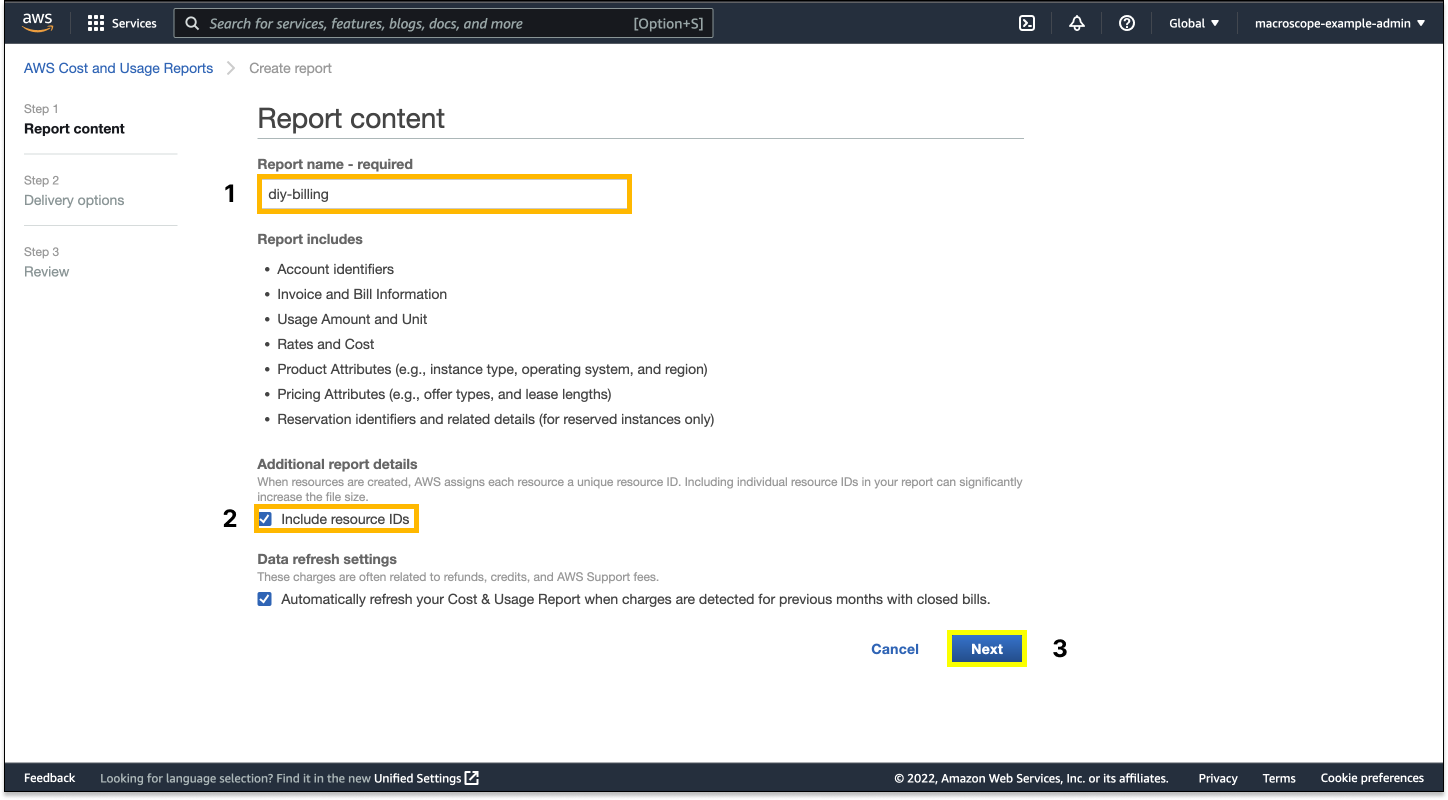
Step 6: Report Content
On the ‘Report Content’ page, choose a report name (I chose ‘diy-biling’), check the box to Include resource IDs, and click Next.
Checking the box next to Include resource IDs will add a field to the CUR that will show a unique resource ID for all resources active in your environment. This will make the report much larger, but the level of detail is crucial to understanding how resource usage impacts cost.
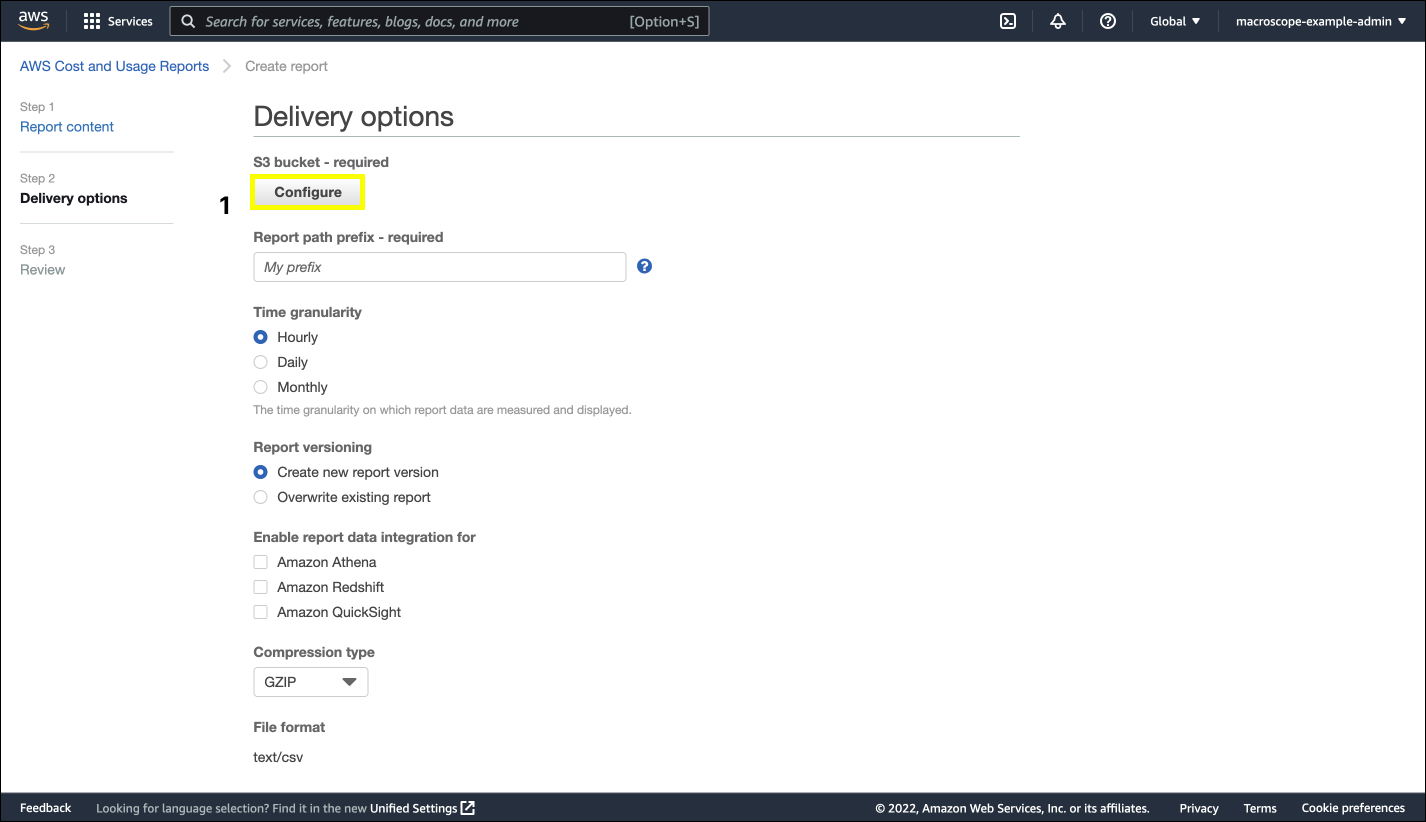
Step 7: Storage Options
On the Delivery Options page, users determine the granularity of the data collected, where the CUR will be stored, and how the data will be stored.
All CUR reports are delivered to an S3 bucket. You must decide whether to create a new S3 bucket or use an existing bucket (both options are included in the IAM permissions provided in this guide). To open the S3 bucket menu, click on Configure.
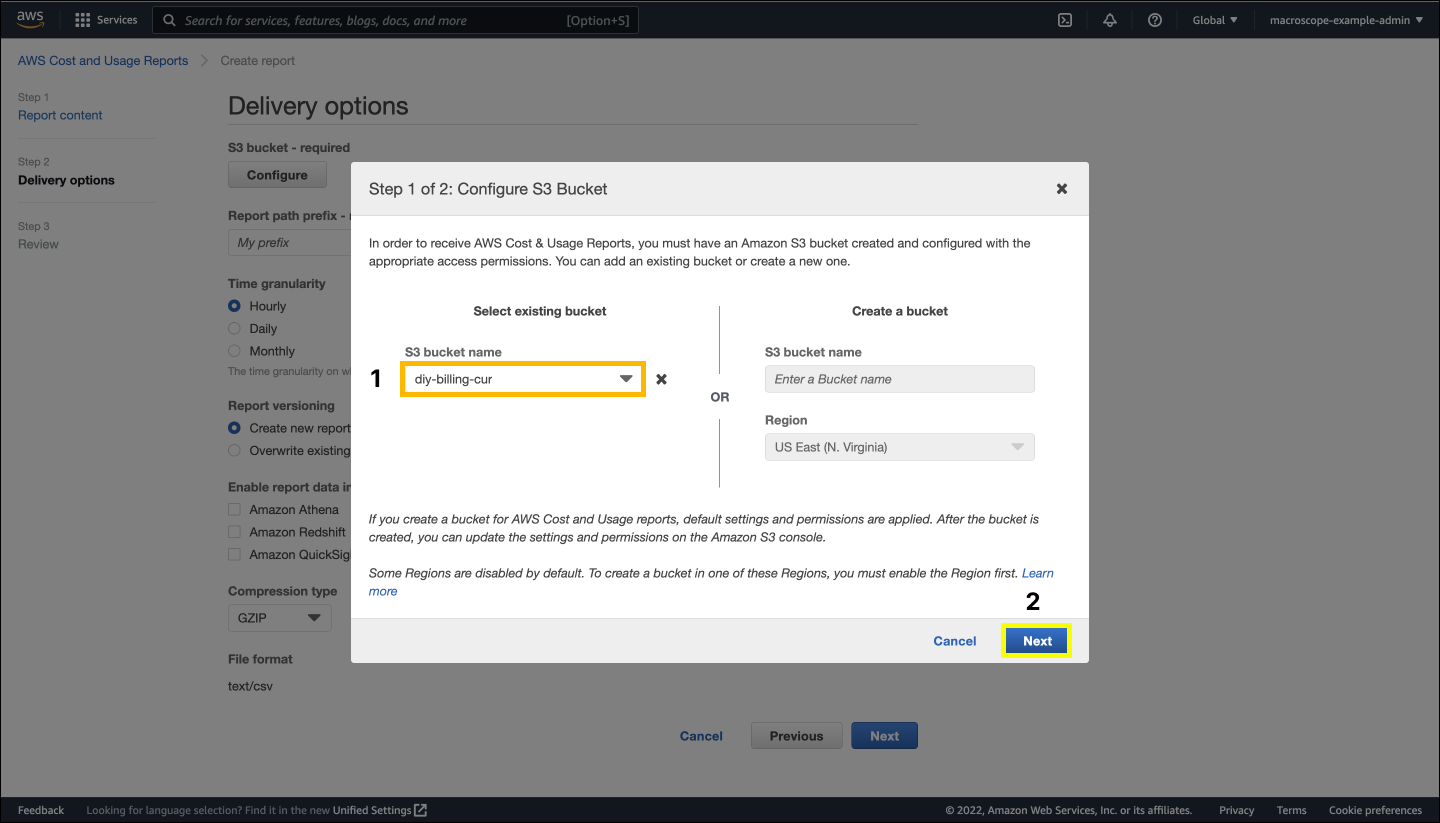
Step 7a: Setup Delivery to Existing S3 Bucket
The left side of the Configure S3 Bucket menu is where users can Select an existing bucket.
To Select an existing bucket, click the dropdown below S3 bucket name, select the bucket you’d like the CUR to be delivered to, and then click Next. This example uses a bucket called ‘macroscope-diy-billing’ that was previously created.
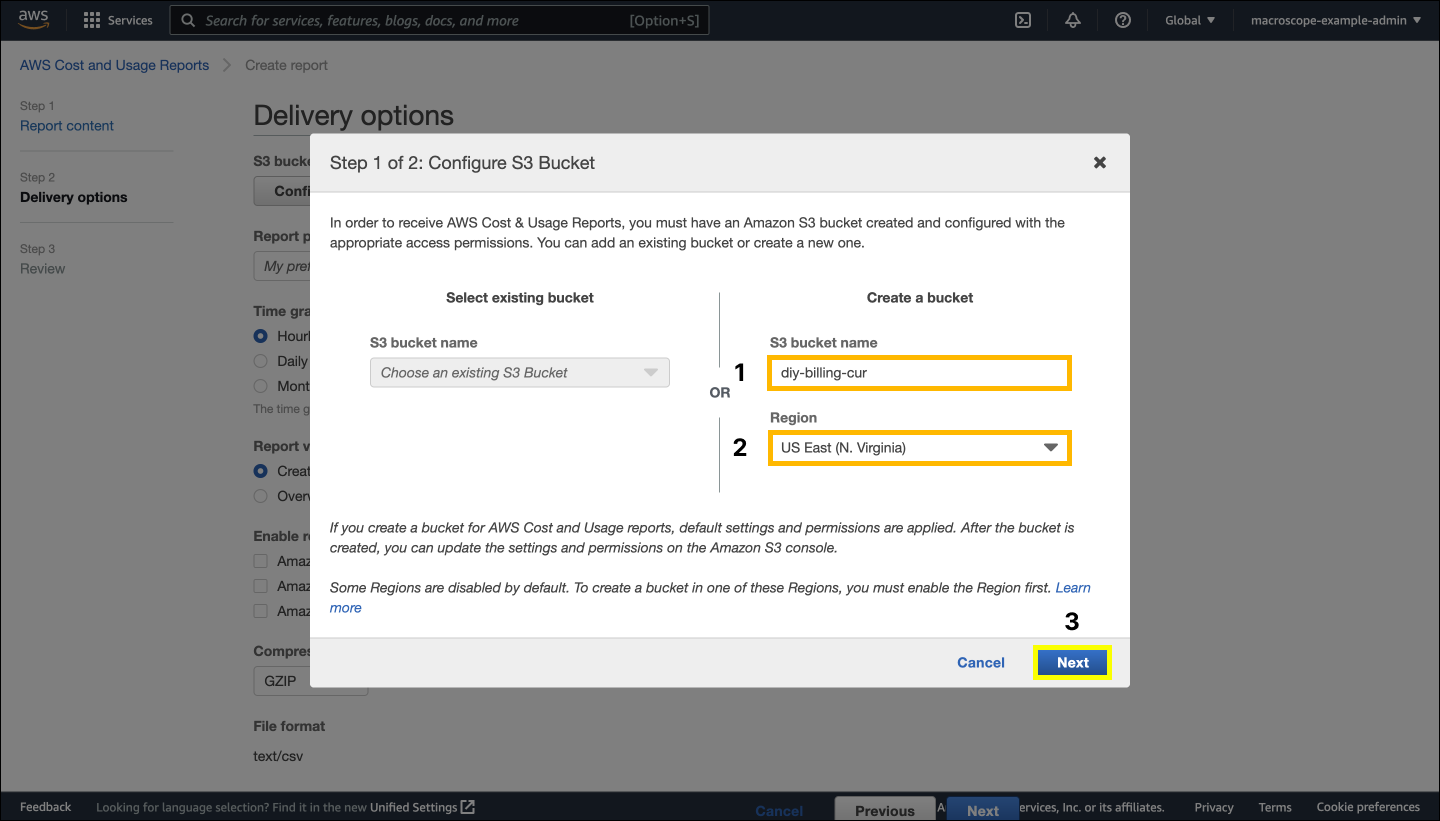
Step 7b: Setup Delivery to a New S3 Bucket
To Create a Bucket, on the right side of the Configure screen, enter a unique S3 bucket name, select your Region, and then click Next.
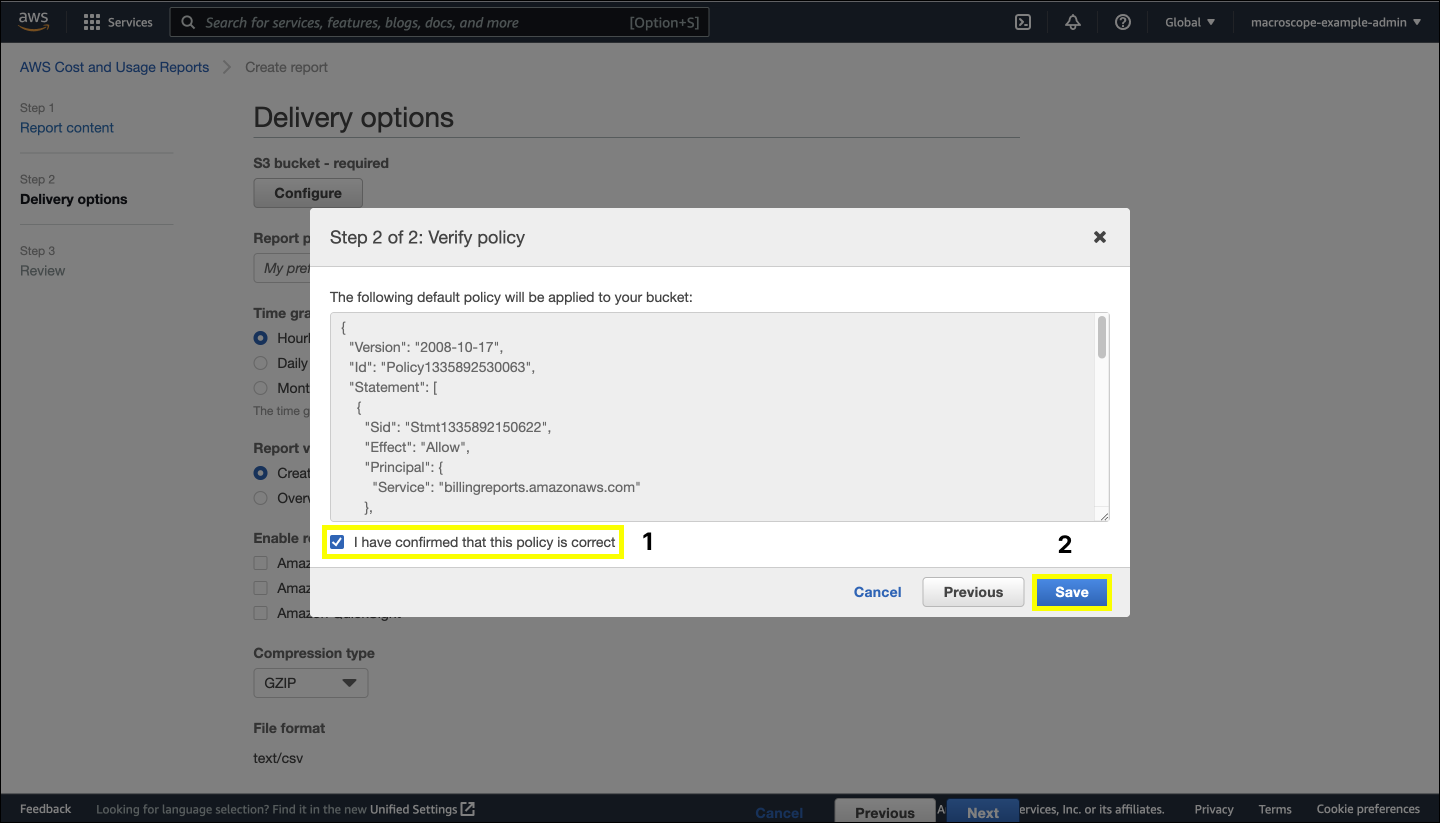
Step 8: Confirm S3 Bucket Policy
Whether you selected an existing bucket or created a new bucket, the next screen will ask you to verify the policy should be applied to your bucket. If you are selecting an existing bucket, this policy will overwrite the existing one. Check the box next to ‘I have confirmed that this policy is correct’ and click Save.
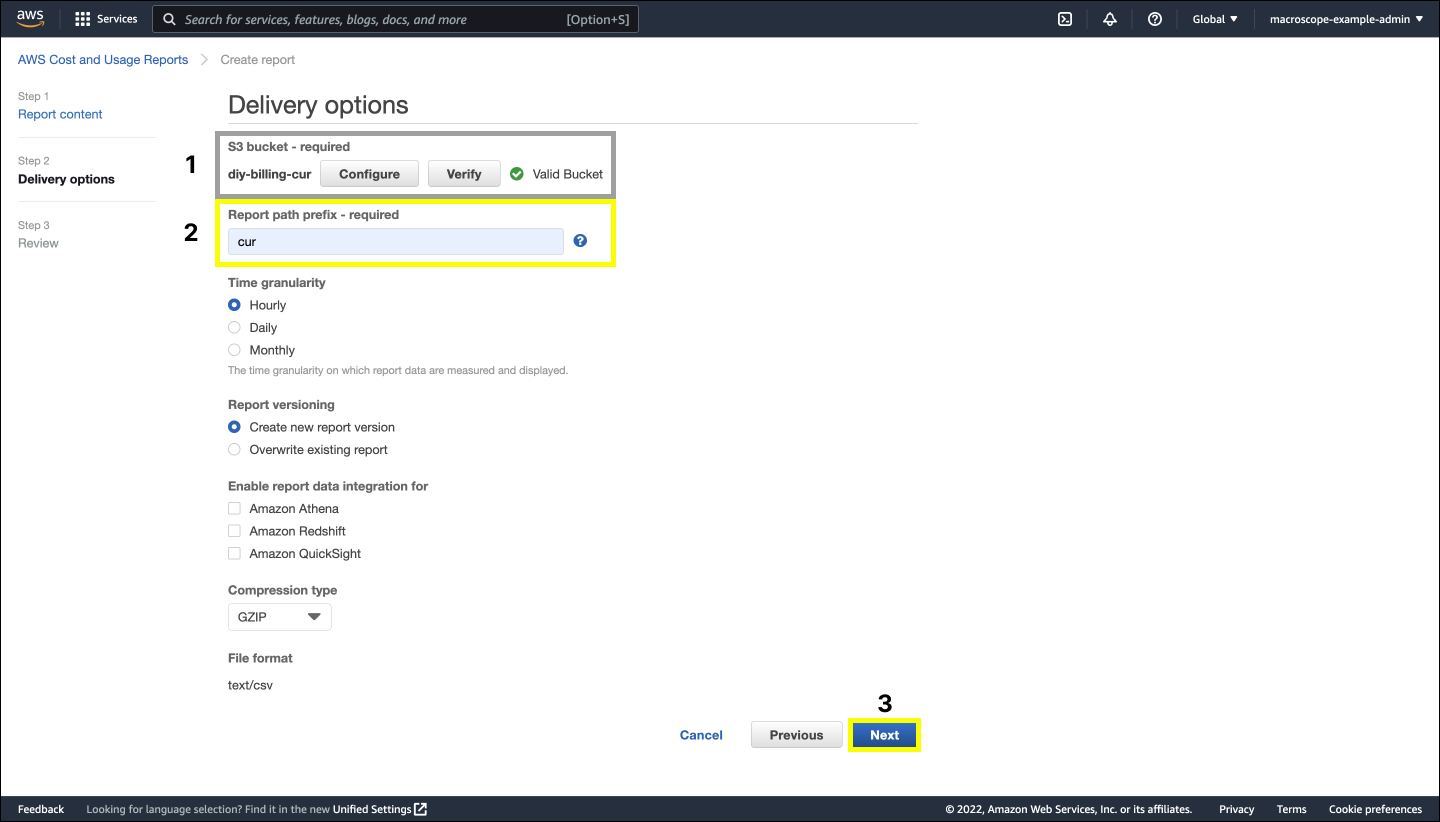
Step 9: Other Delivery Options
After clicking Save, you will be returned to the Delivery Options page. Here you should see that the existing S3 bucket you chose or the new S3 bucket you created is a Valid Bucket.
Next, choose a Report path prefix (this example uses ‘cur’), leave all other settings as the default, and then click Next.
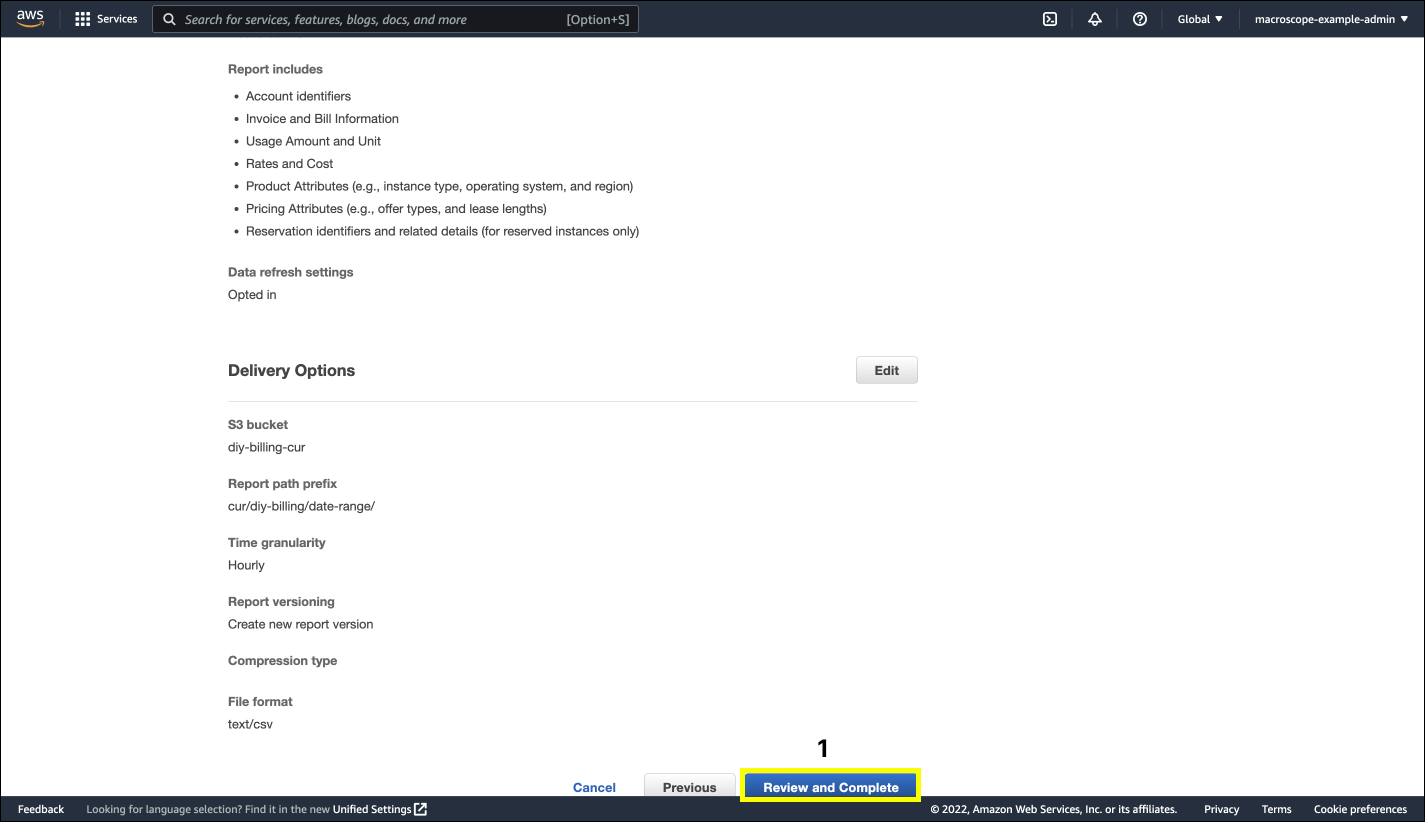
Step 10: Review and Complete
On the Review page, review the details for Report Content and Delivery Options. Once comfortable with the data, scroll to the bottom of the page and click Review and Complete.
After clicking Review and Complete you will be brought back to the AWS Cost and Usage Reports page. If everything was successful, you will see a Report created successfully banner on the top of the screen.
Next Step
The Cost and Usage Report has been created and the report status has been confirmed. The next step is to go through the steps of Downloading a CUR file for local SQL analysis.
Downloading CUR Files
After creating a Cost and Usage Report, it will take approximately 24 hours for the first version of our report to be sent to S3. Once a report has been saved, data can be downloaded and used for analysis.
Based on how the CUR was created, a new version of the CUR is saved into S3 every day with cumulative data for the month. This report versioning was enabled in case there are updates to historical billing data, and the reports need to be compared. To order to get the most up-to-date cost information, download the most recent file for each month.
Step 1. Go to aws.amazon.com
First, go to aws.amazon.com and click sign in in the top right corner.
Step 2: Log in to AWS
Enter your Account ID, IAM user name, and password. Then click Sign In. Make sure this is the account where the CUR was created.

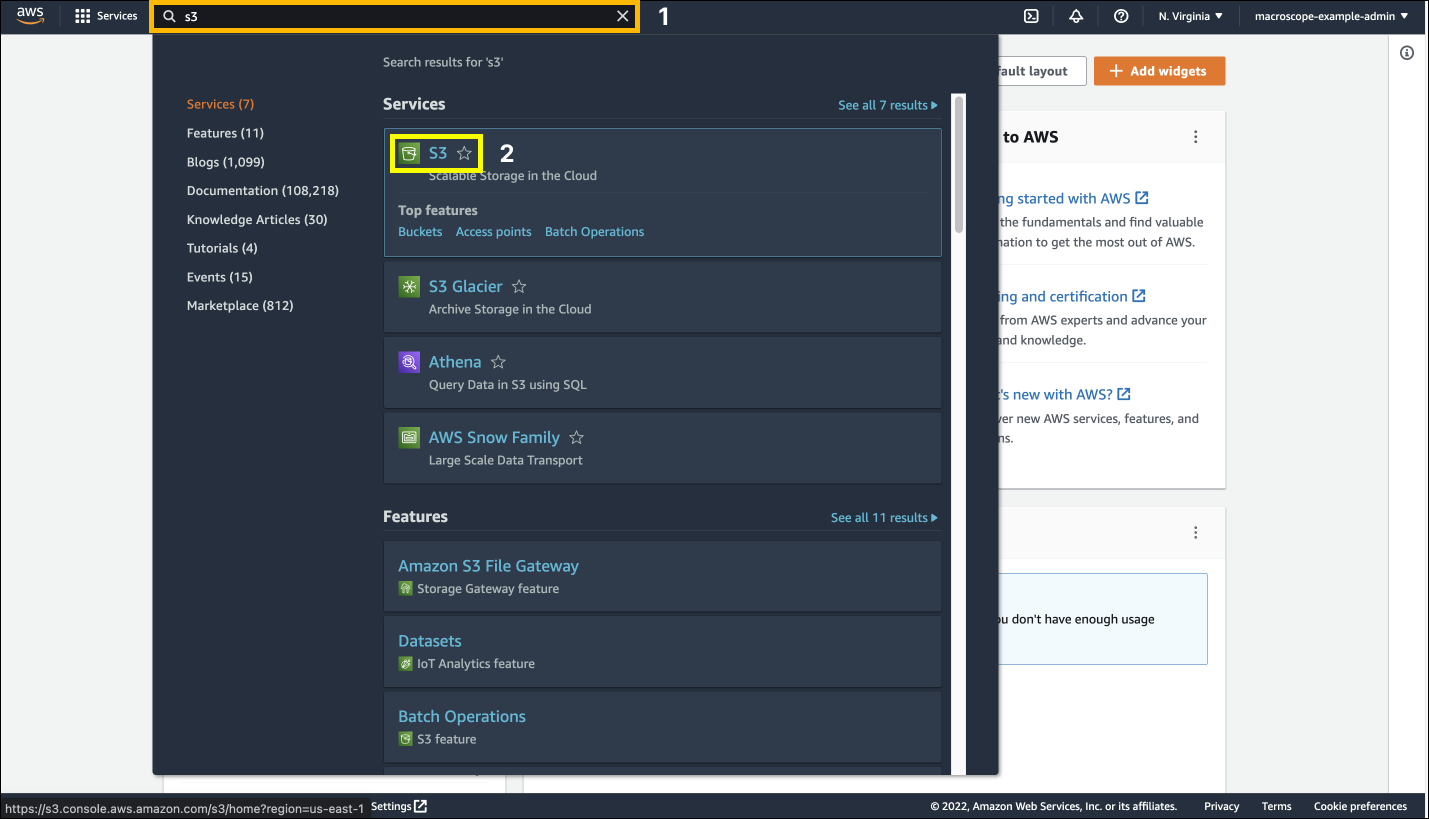
Step 3: Search for S3
From the AWS Management Console, in the search bar, search for s3 and click on S3 to go to the S3 Console.
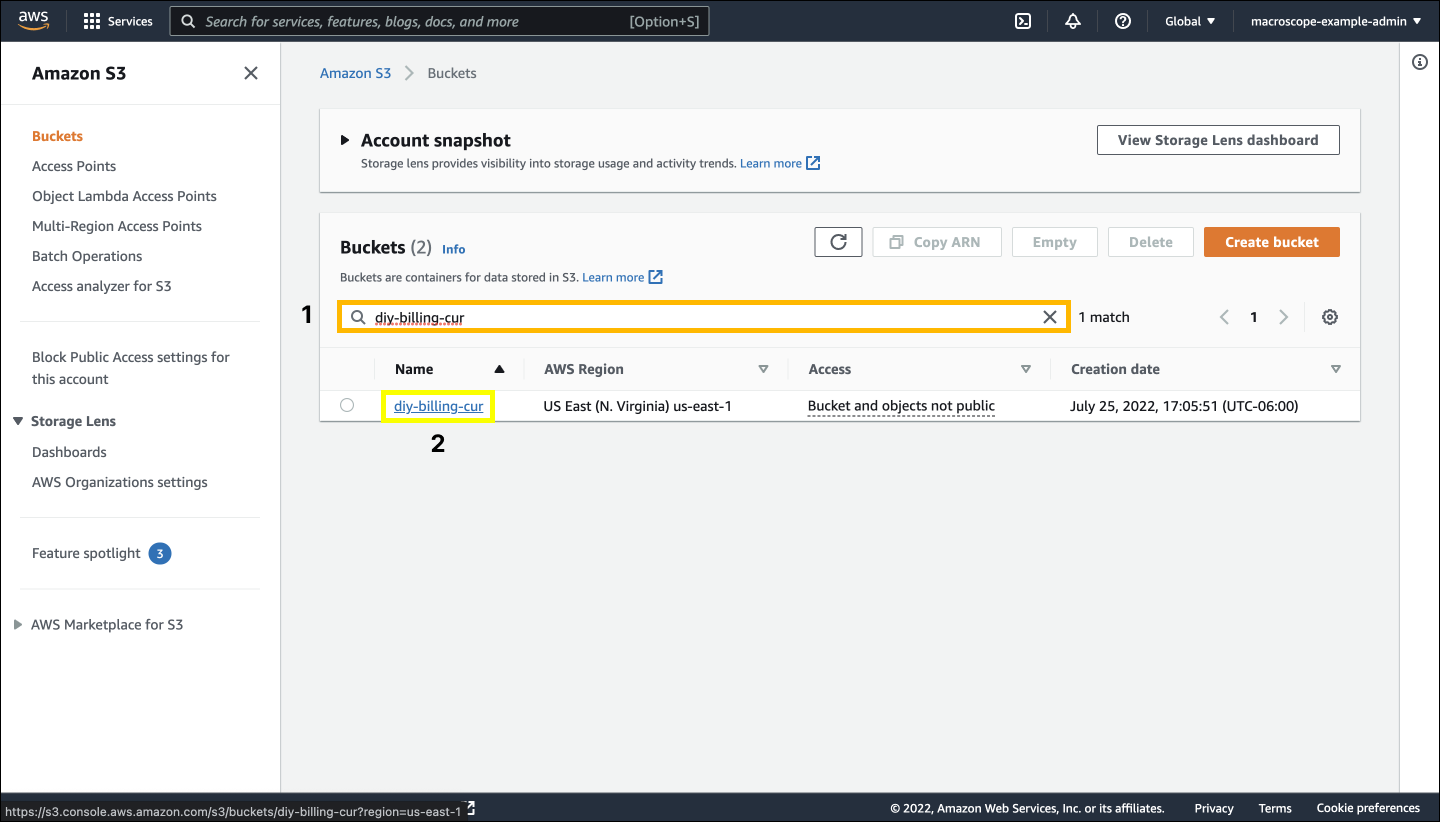
Step 4: Select the S3 Bucket
Select the S3 bucket where your CUR is stored. If there are many S3 buckets in the account, use the search bar that says filter buckets by name.
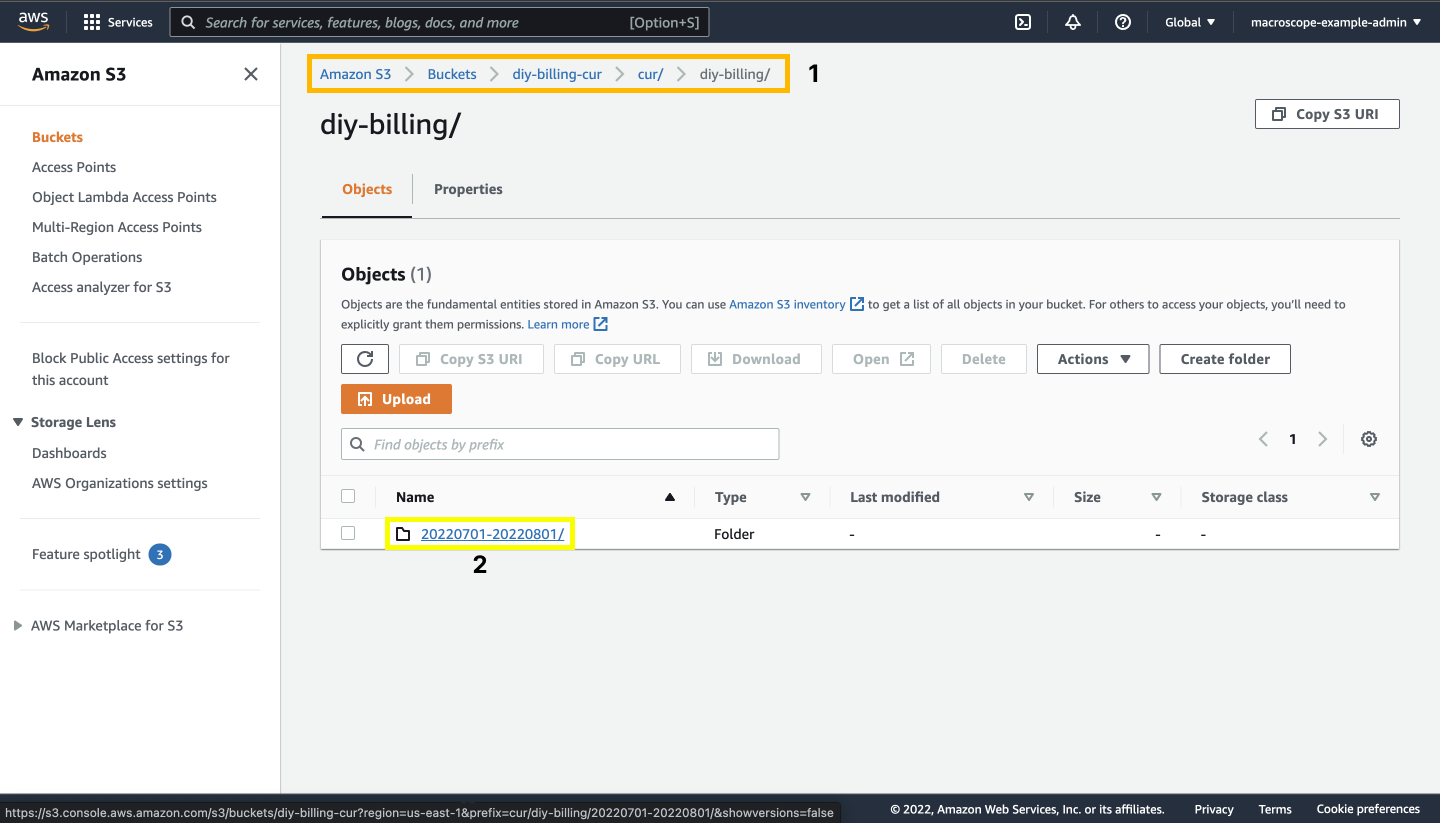
Step 5: Navigate to Path Prefix of the CUR
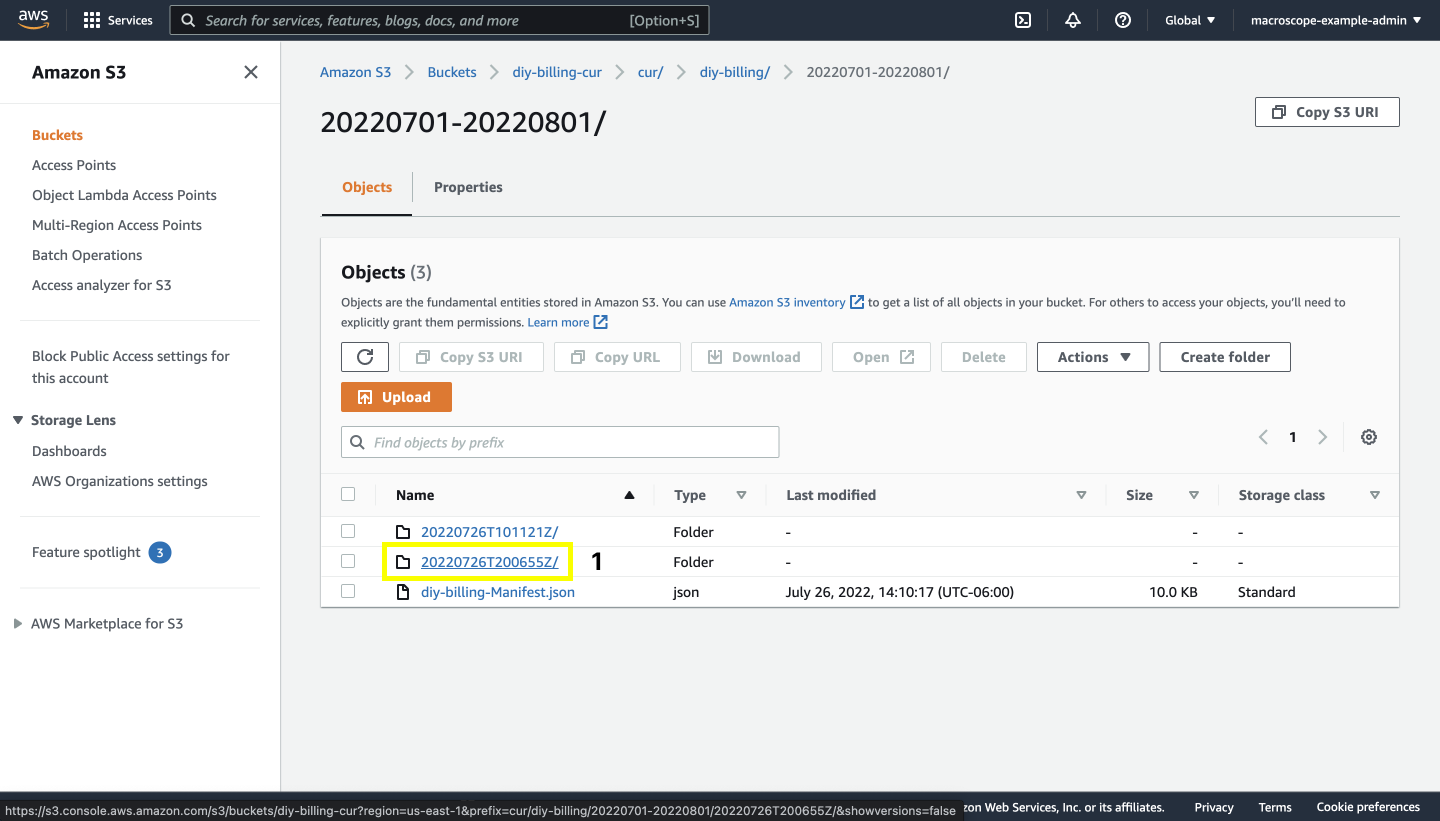
Once you have selected your S3 bucket, navigate the folders to the path prefix where your CUR is stored. The screenshot below shows that my path prefix is outlined at the top of the screen. This path prefix will contain folders for each month with an active CUR. Select the most recent month to open that folder.
Step 6: Select the Most Recent CUR Version
In the folder for the most recent month, there will be a folder for every day of the month where a CUR has been saved. To find the most recent version, scroll to the bottom of the page and open the most recent folder. This should be the second-to-last item in the folder. The last file is a JSON manifest that does not help us right now.
Step 7: Download the CUR CSV
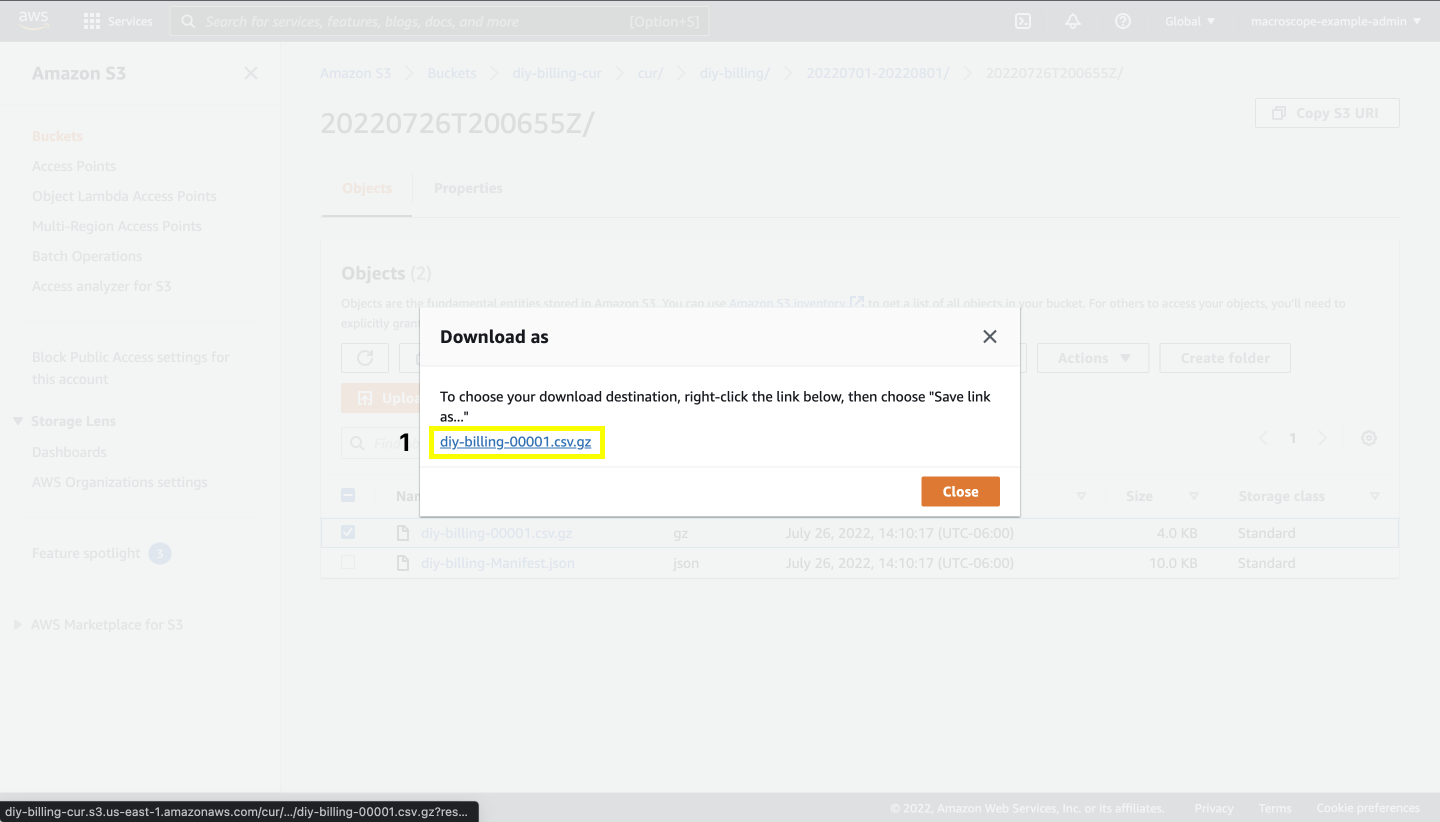
In this folder, you will see at least one %.csv.gz file. This file is a compressed version of your Cost and Usage Report. To download this file, select the checkbox to the left of the file name, then select the Actions drop-down in the Objects menu and click Download as.
If there are multiple %.csv.gz files in this folder, all of them will need to be downloaded to get the full bill.

Step 8: Download to Desktop
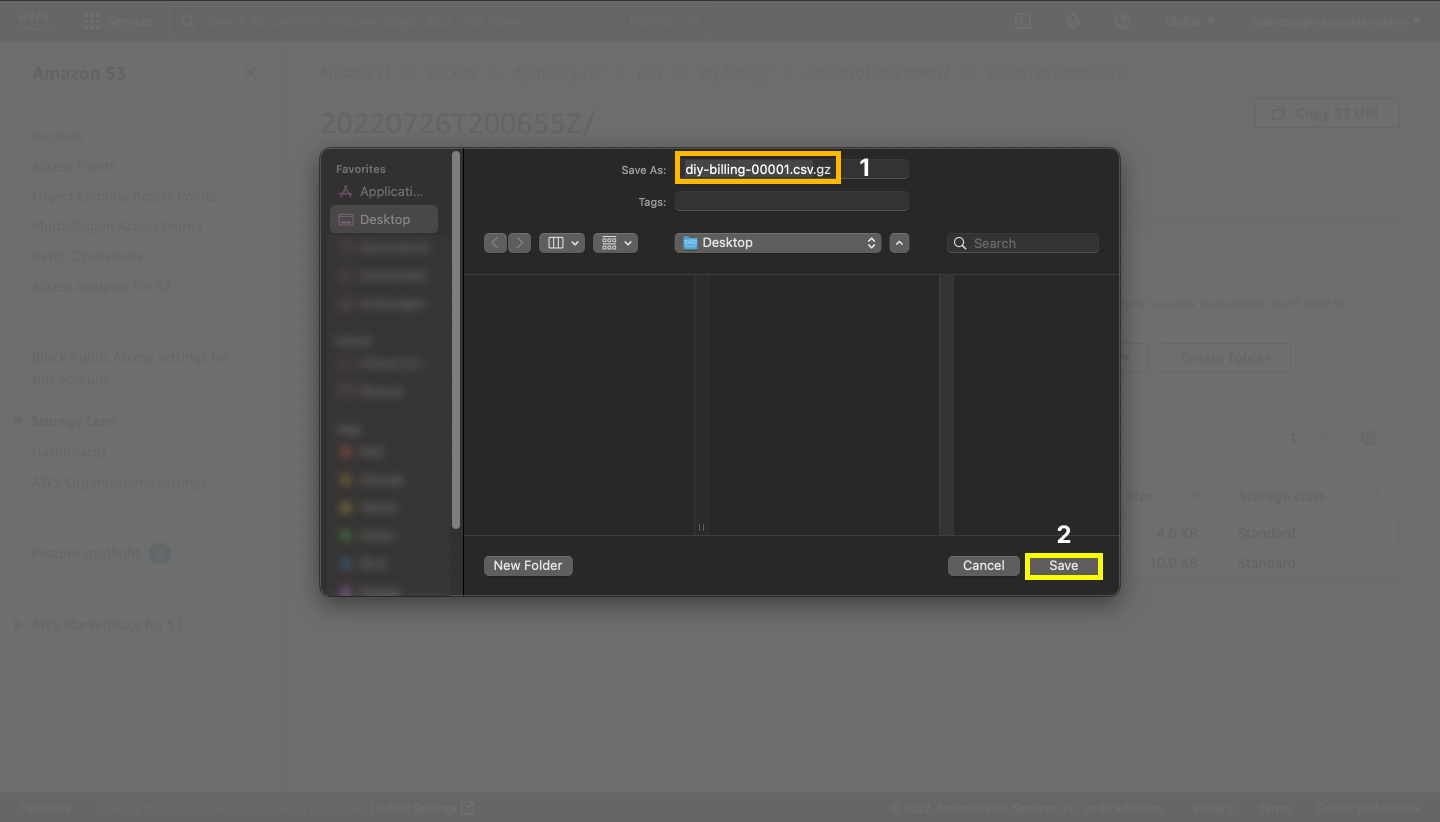
This will open the Download as window. Follow the instructions on the dialog box: right-click the link below, choose Save Link as… and save the file to the location of your choice.
In this example, the CUR was saved as ‘macroscope-diy-billing-00001.csv.gz’ on the desktop. Make sure to un-zip your CUR files prior to beginning analysis.
Next Steps
With the CUR file downloaded, the last step is to set up a local development environment using SQLite3 to analyze the CUR report contents.
SQLite3
The first step for local analysis is to download SQLite3. The following steps will show how to get started with SQLite3, assuming you’ve installed SQLite3.
Before moving forward, here is some important information about this demo:
- These instructions were created using a Mac.
- CUR file name: macroscope-diy-billing-00001.csv
- CUR directory is /Desktop
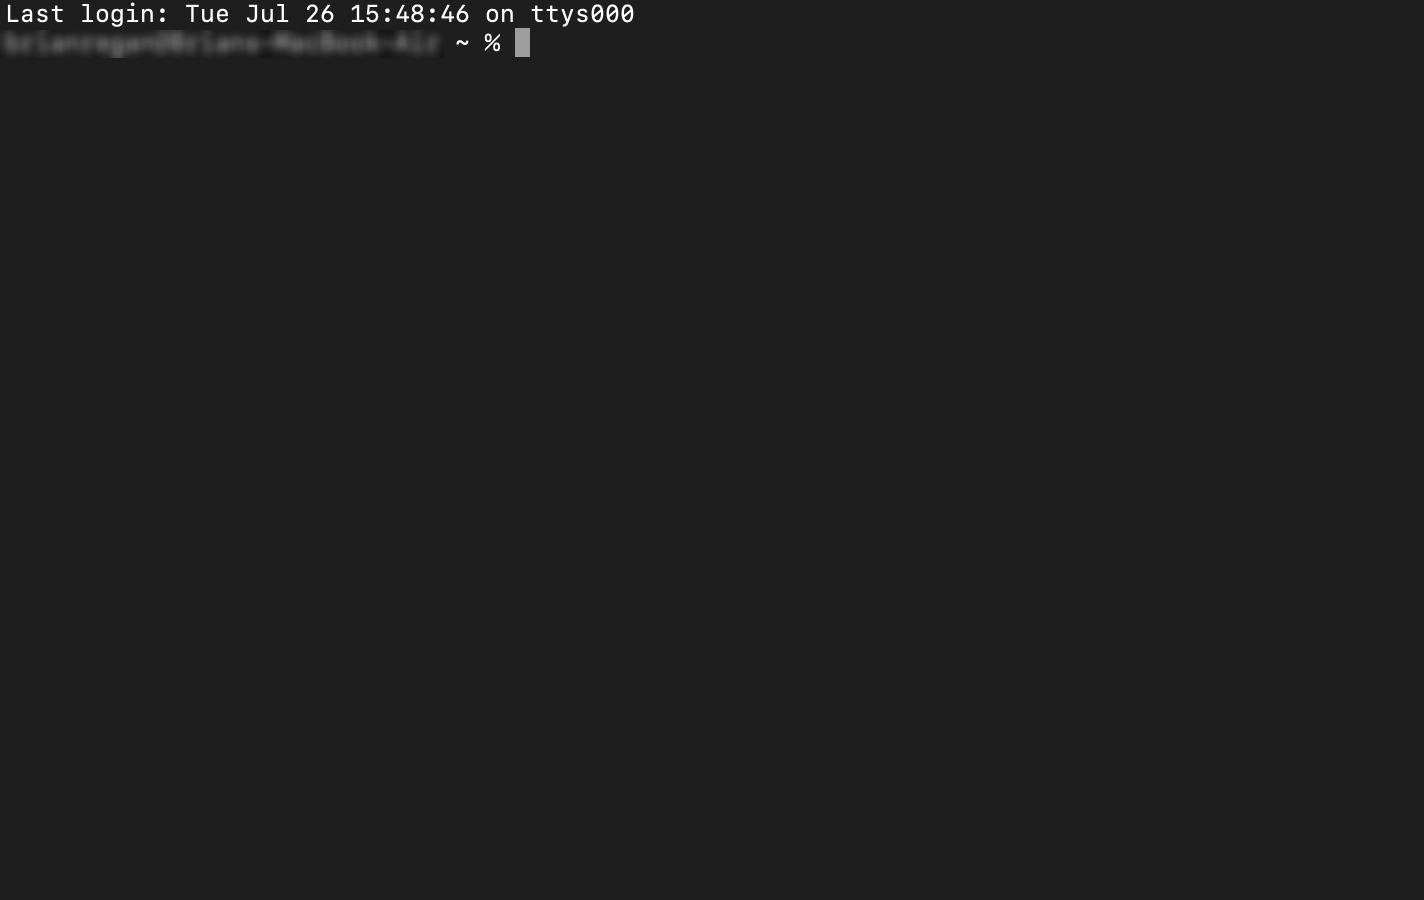
Step 1: Open a terminal
This example uses the default mac Terminal.
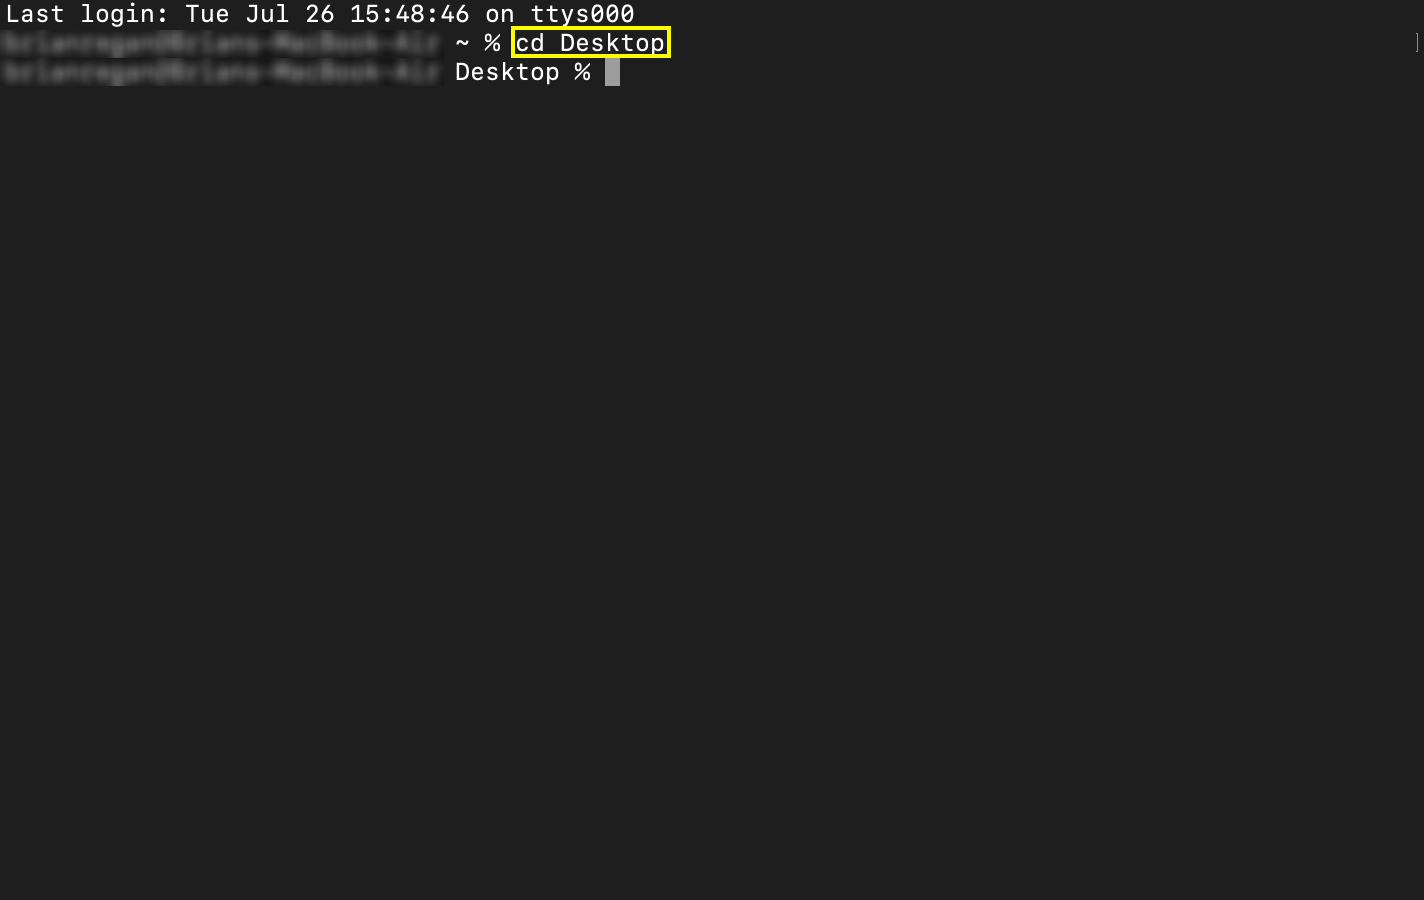
Step 2: Navigate to your CUR Directory
Based on the CUR directory for this demo, the command to navigate to the CUR Directory is cd Desktop.
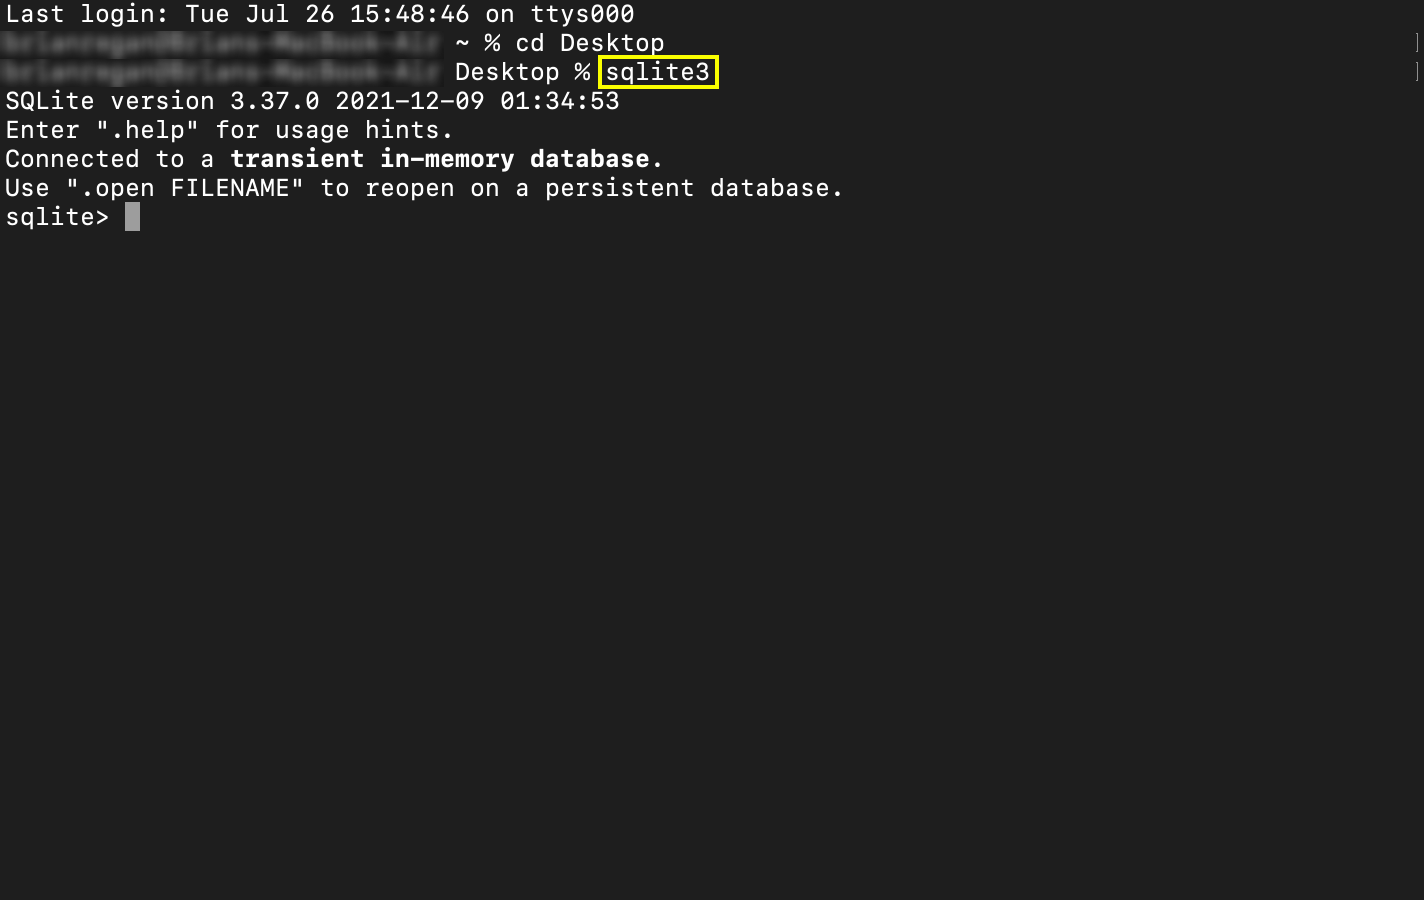
Step 3: Start SQLite3
Run the command ‘sqlite3’ to start SQLite3
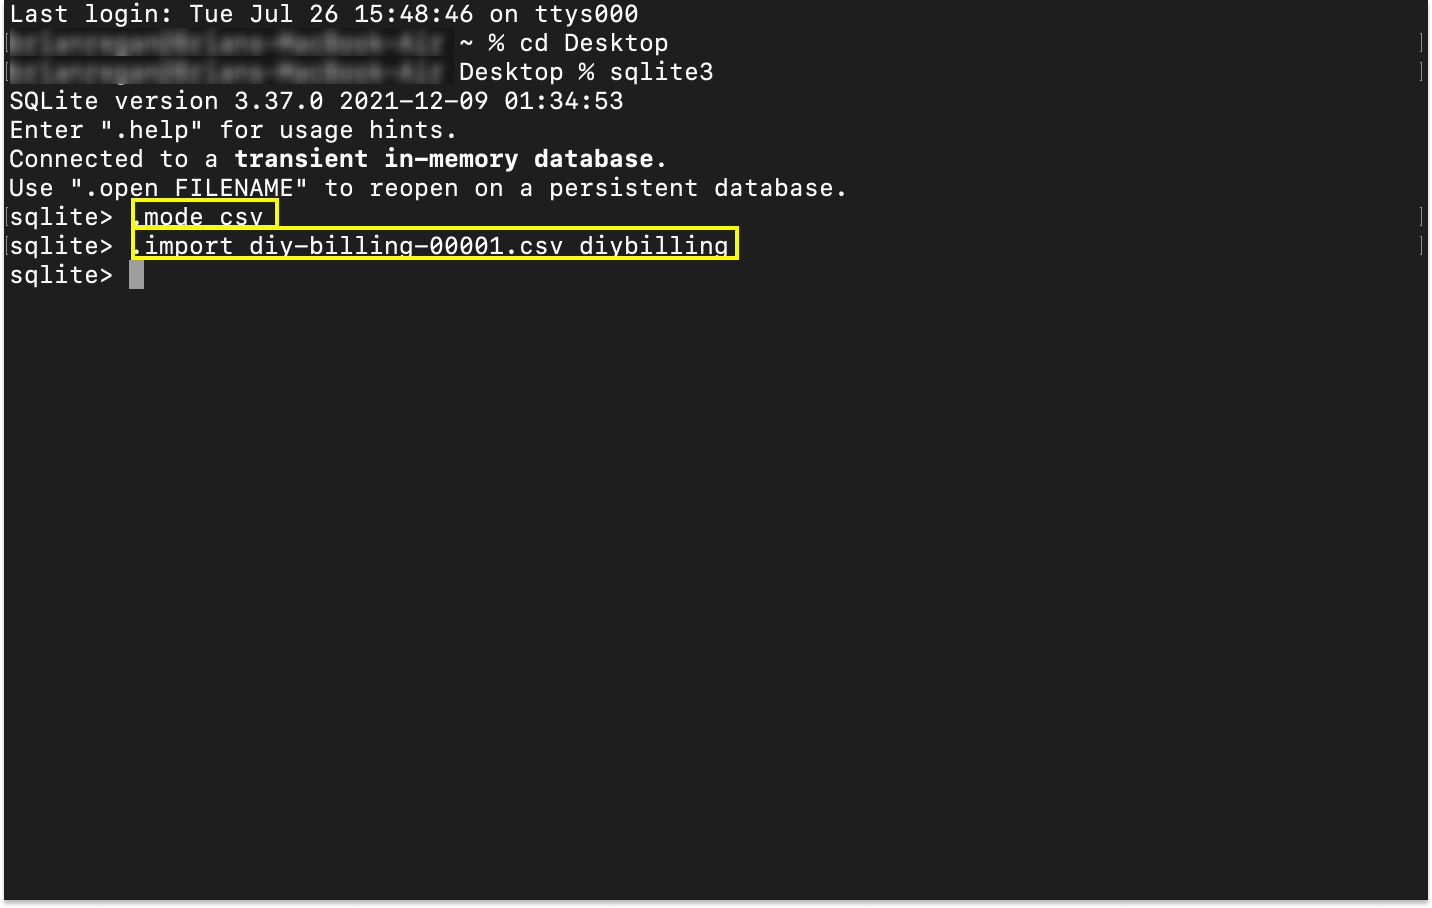
Step 4: Set Mode & Import
Run the command .mode csv to enable SQLite3 to read .csv files. Then import your CUR file using the .import command.
This demo imports the file ‘macroscope-diy-billing-00001.csv’ as a table called ‘diybilling’.
Step 5: Run a Test Query
Once the table has been imported, run a sample query to see if any results are returned. The sample query used in this demo is below.
select * from diybilling limit 1


